
Flowering Stage Timeline: What to Expect Week by Week
Flowering typically runs 7-12 weeks depending on strain, and it







When it comes to discreet smoking, a sploof is like your secret weapon. It’s a simple gadget that works wonders in getting rid of that smoky smell, making it perfect for anyone who wants to enjoy a puff without tipping off nosy neighbors or roommates. In this detailed guide, we’ve got your back with sploof definition and all the ins and outs of crafting your very own sploof right at home. So, if you’re keen on keeping your smoke sessions low-key, stick with us for the ultimate DIY sploof tutorial.
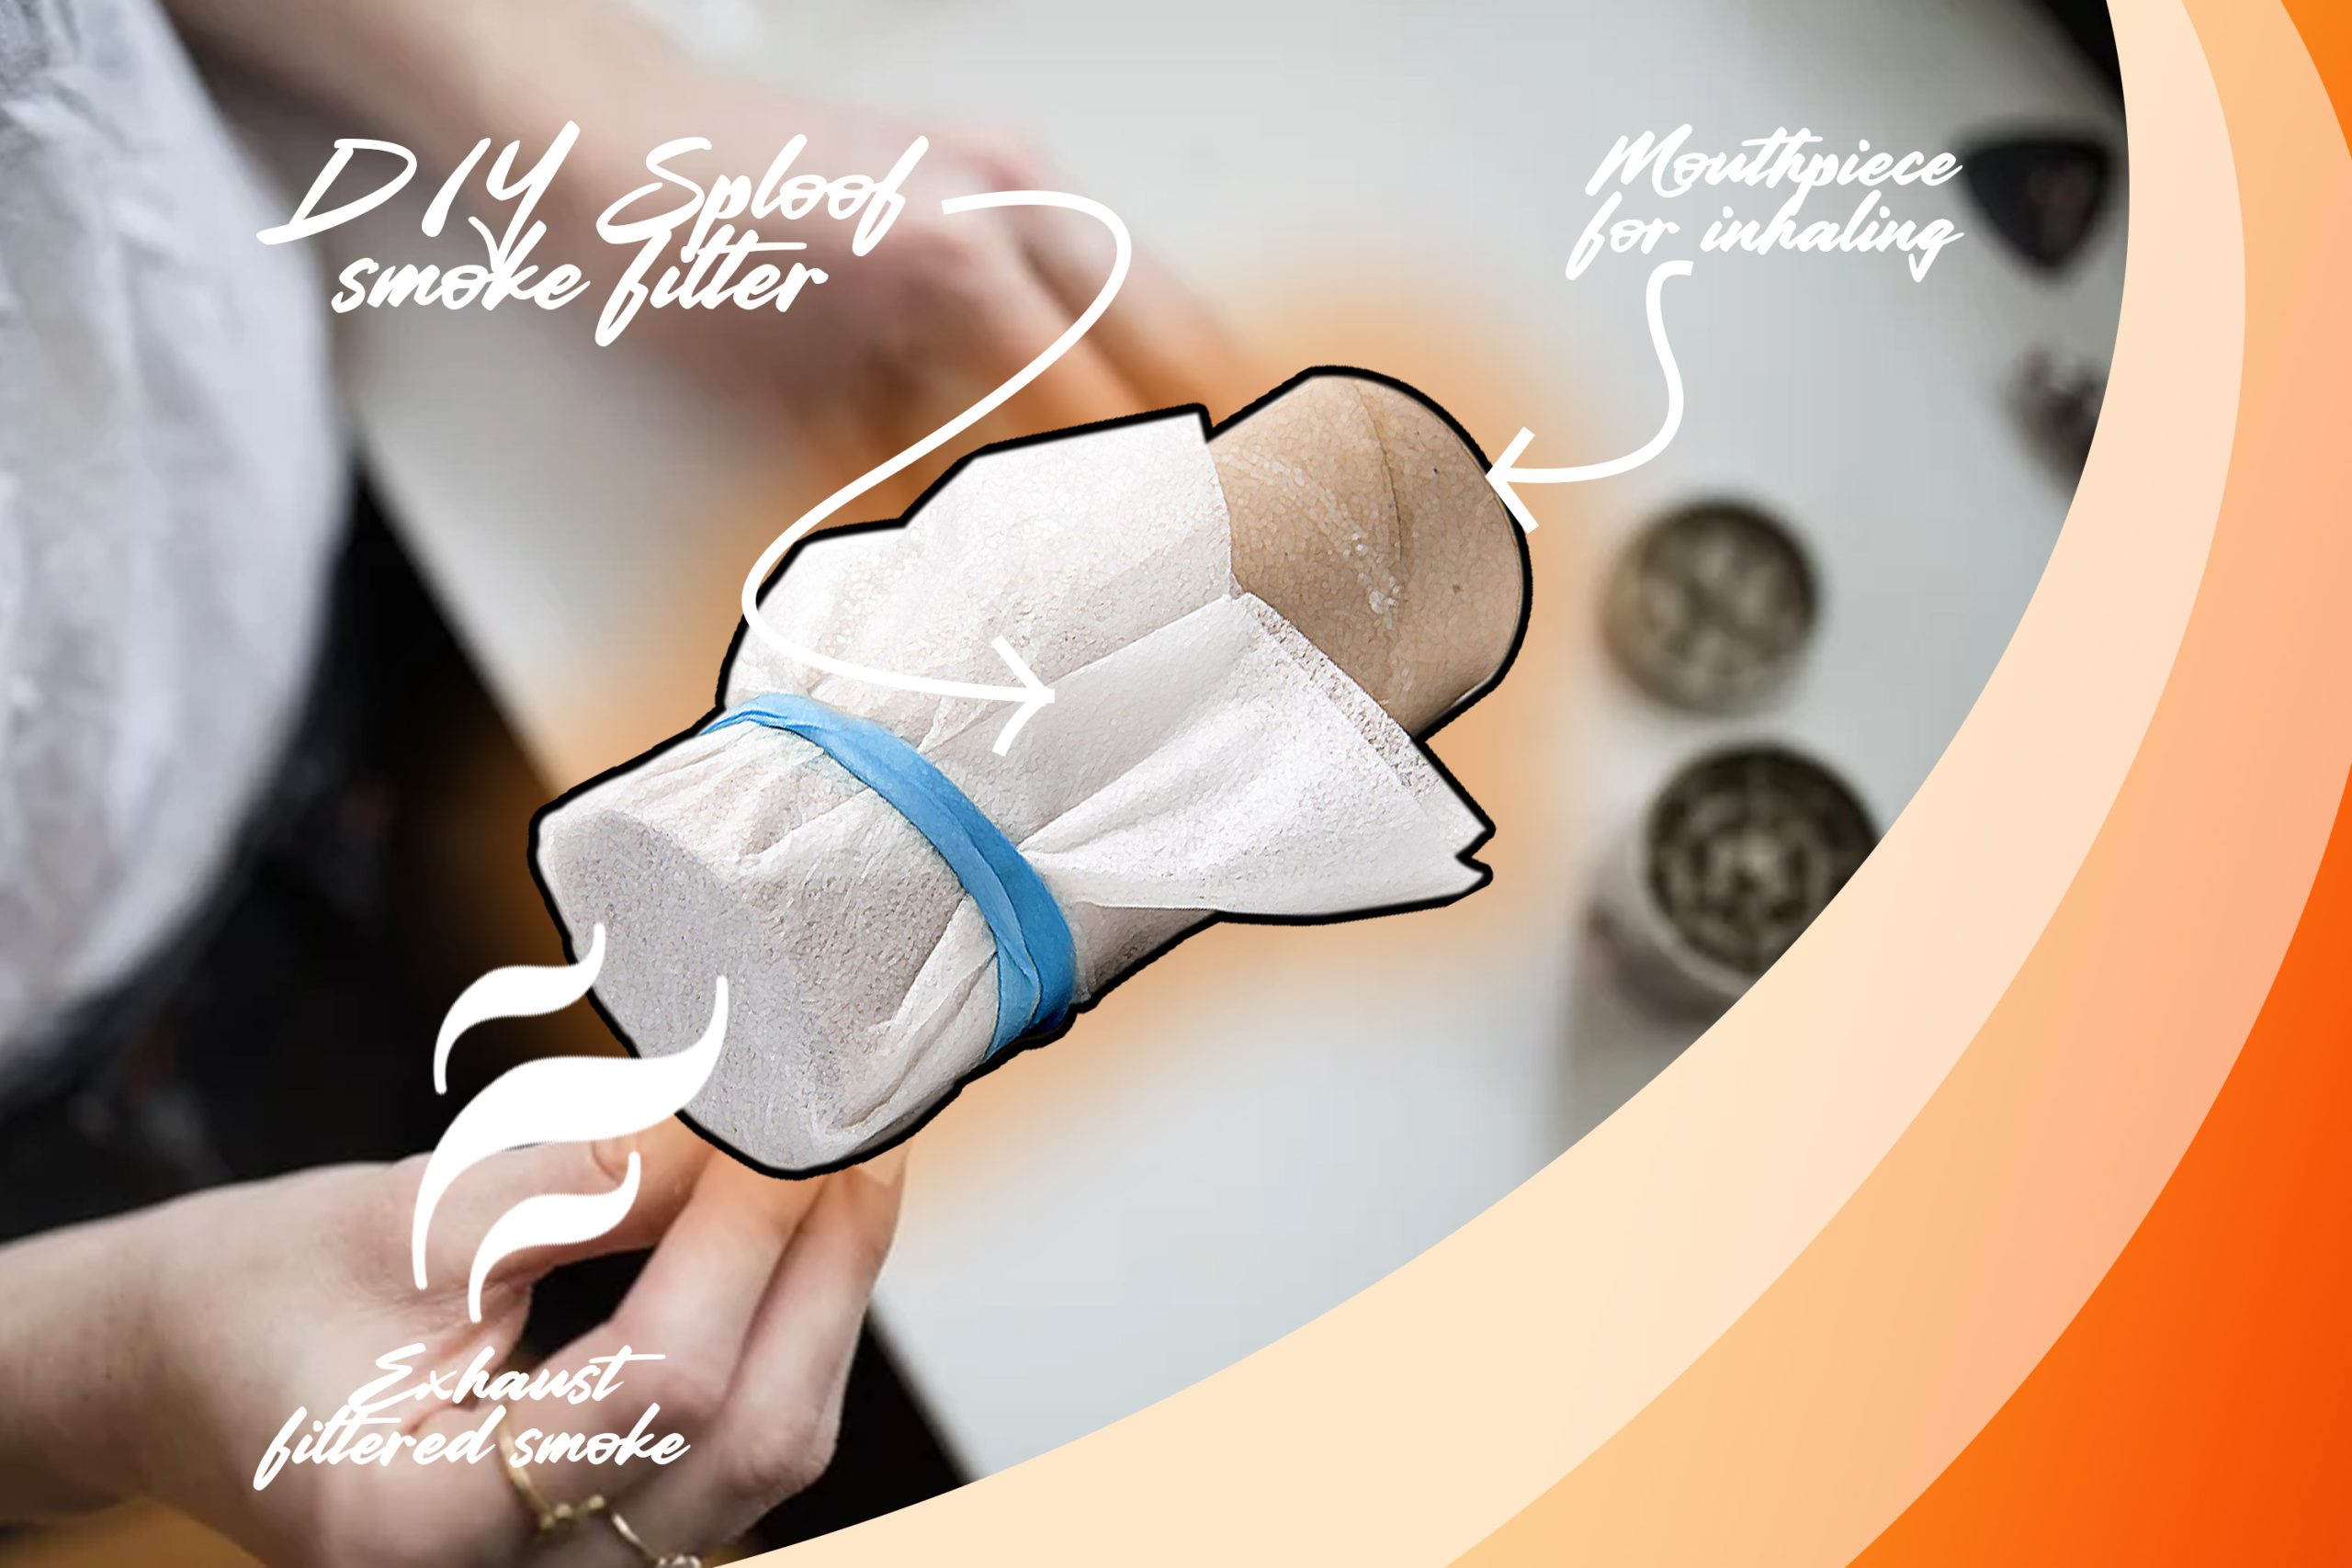
Whether you’re in a shared living space, a non-smoking area, or simply want to keep your smoking habits private, a sploof provides an effective solution by neutralizing the odor of smoke. Smoking indoors can leave lingering odors that can be difficult to remove, leading to discomfort for non-smokers and potential conflicts in shared living spaces. A sploof offers a simple yet effective way to address this issue, allowing smokers to enjoy their habit without inconveniencing others or risking unwanted attention.
Additionally, sploofs are particularly popular among cannabis users who may need to conceal the smell of their smoking sessions. Whether you’re living in a dormitory, apartment, or family home, spoof smoke offers a discreet way to indulge in your favorite herbs without drawing attention to yourself.
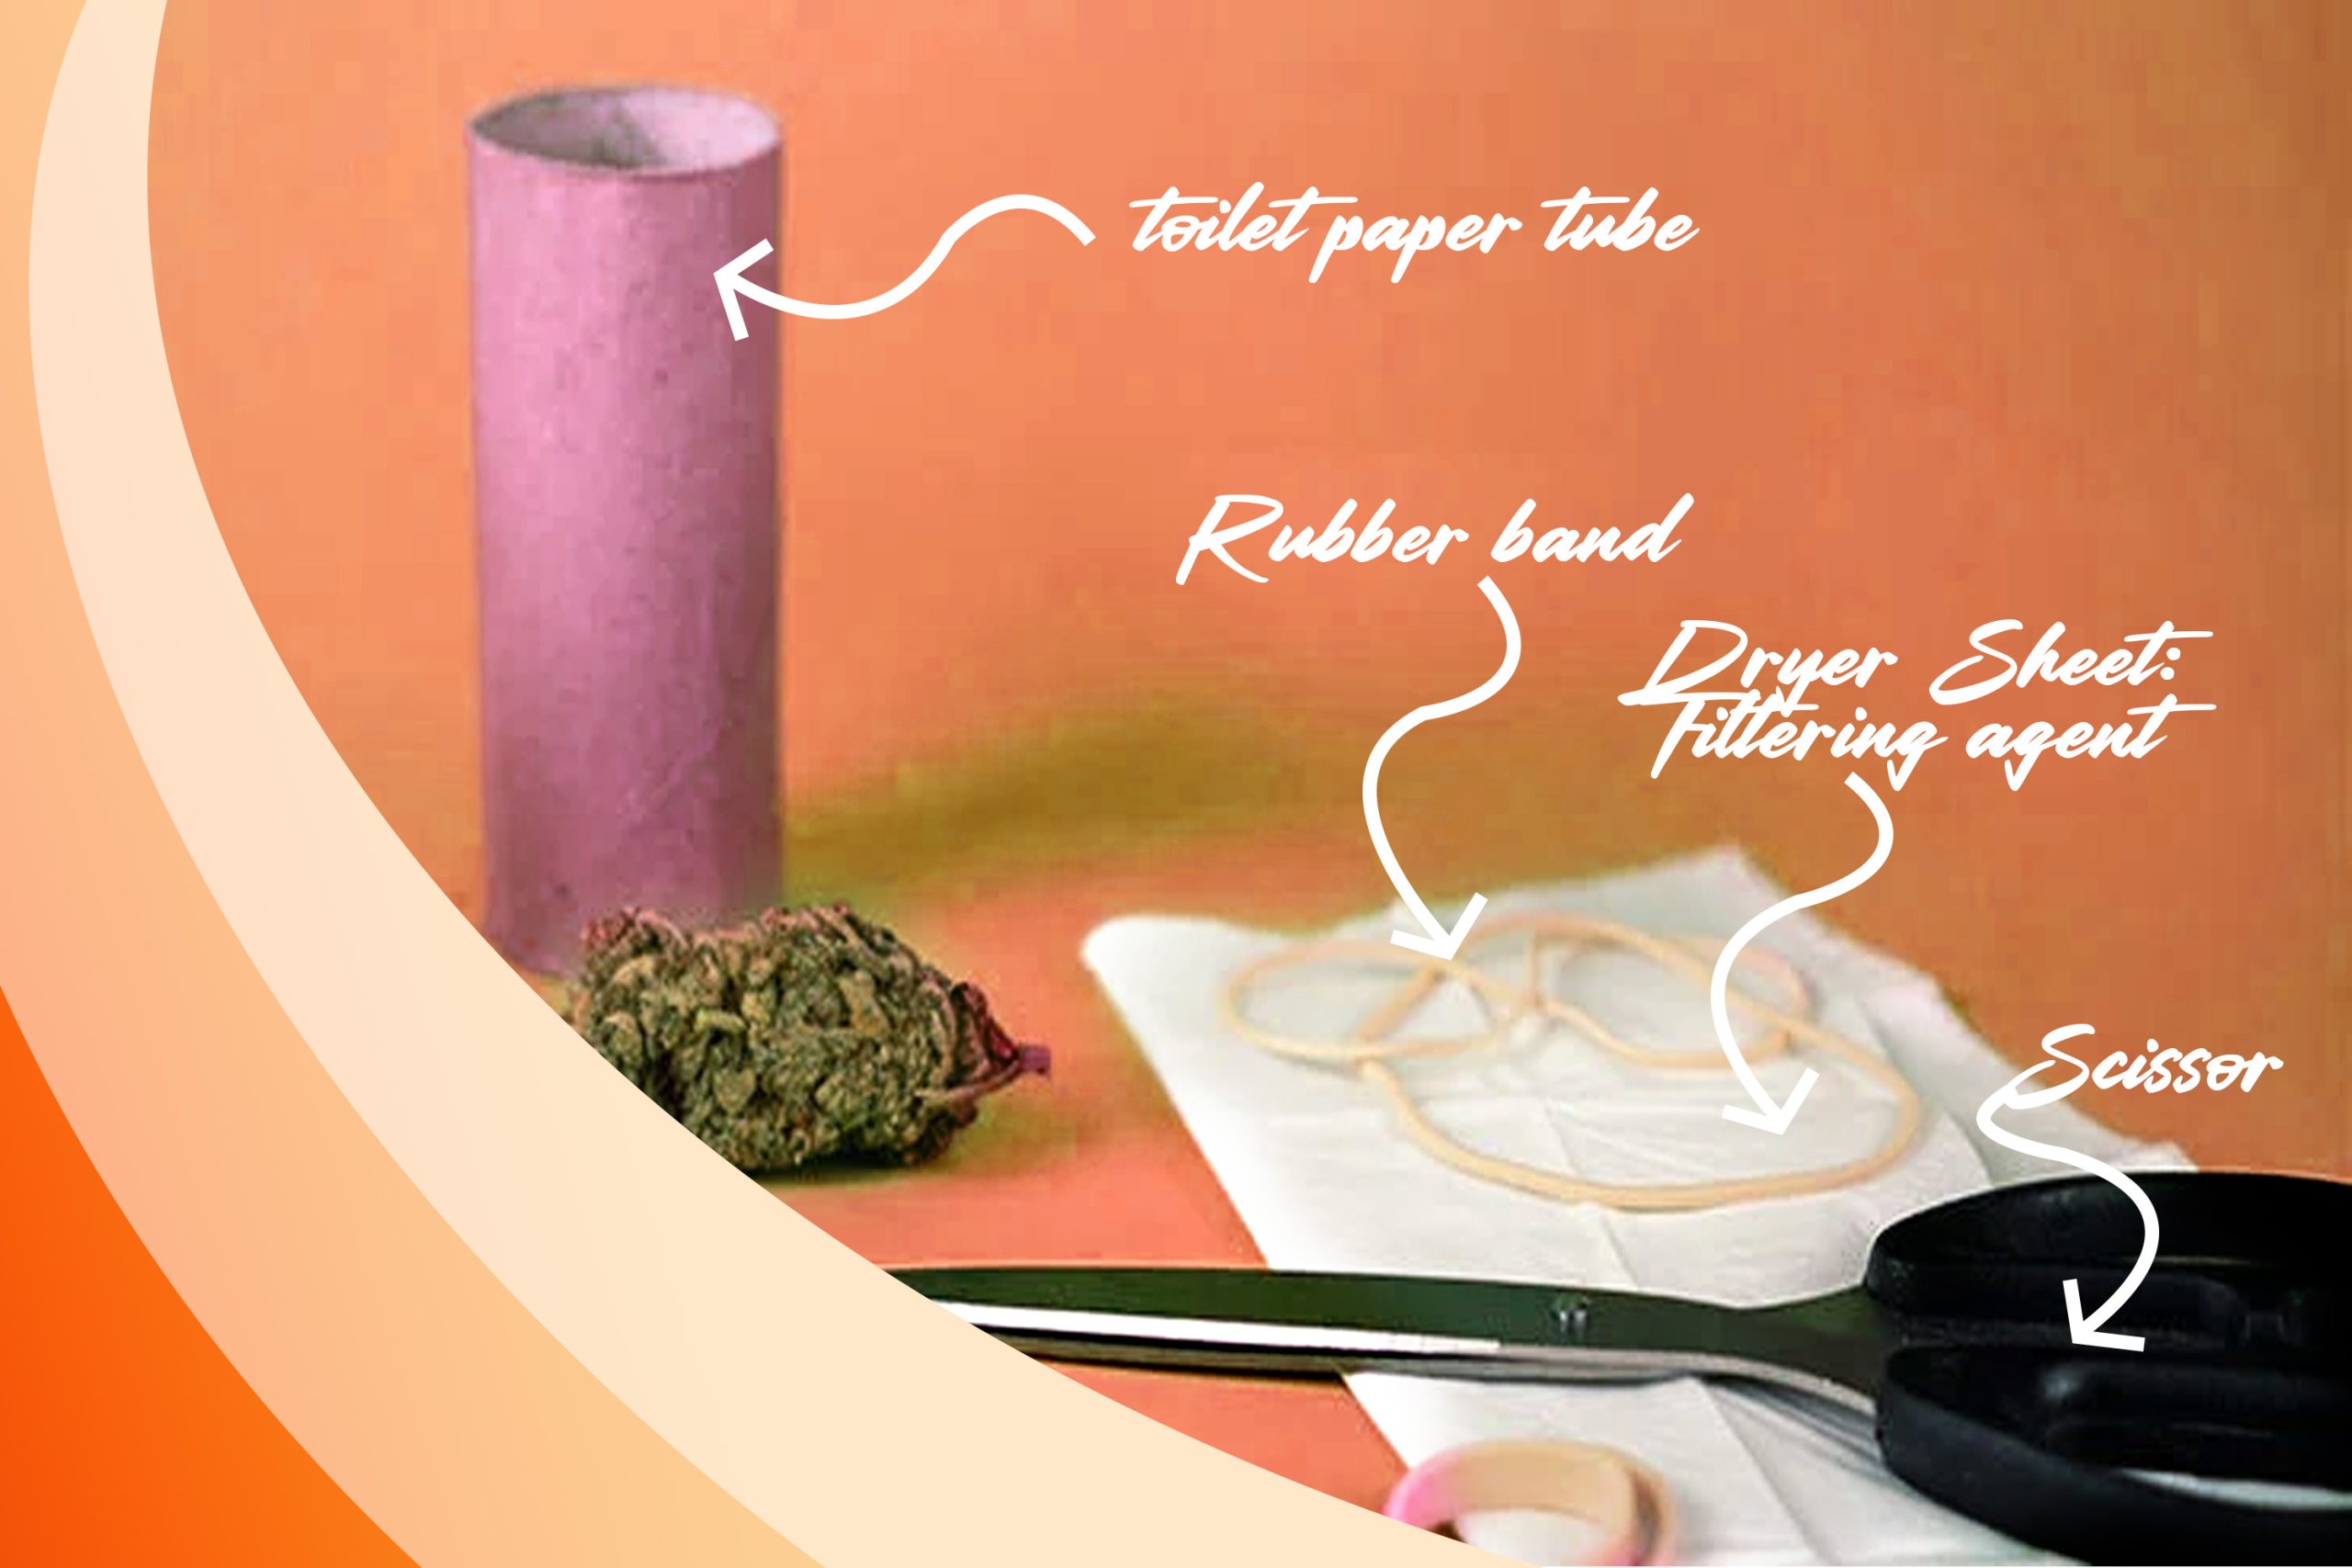
Creating a sploof requires minimal materials, most of which you likely already have at home. Here’s what you’ll need:
Gathering these materials is a straightforward process, ensuring that you can quickly and easily assemble your DIY sploof without the need for specialized equipment or extensive preparation.
Now that you have your materials assembled, let’s walk through the process of constructing your homemade smoke filter:
1. Prepare the Container
Start by selecting a suitable plastic bottle or toilet paper tube for your sploof. Remove any labels or stickers from the surface, ensuring a clean and smooth exterior. Using scissors or a knife, carefully cut off the bottom of the container to create an open cylinder.
2. Add the Filter Material
Next, it’s time to insert the filter material into the open end of the dryer sheets in the toilet roll. Whether you’re using dryer sheets or activated carbon, make sure to pack the material tightly to prevent smoke from passing through. This step is crucial for ensuring the effectiveness of your sploof in neutralizing odors.
3. Secure the Filter
Once the filter material is in place, use rubber bands or tape to seal off the open end of the toilet paper roll dryer sheet smoke. It’s essential to create a tight seal to prevent any smoke from escaping through gaps or openings. Take your time to ensure that the seal is secure, as this will directly impact the efficiency of your sploof.
4. Enhance with Fragrance (Optional)
For those who prefer a more pleasant scent, adding essential oils to the filter material can help mask any remaining odor from the smoke. Simply apply a few drops of your favorite essential oil onto the filter material before sealing the container. This step allows you to customize your sploof and create a more enjoyable smoking experience.
Once your sploof is assembled, using it is a straightforward process that requires minimal effort. However, mastering the technique can help maximize the lifespan and effectiveness of your smoke filter. Here are some tips for getting the most out of your sploof:
Crafting your sploof offers several advantages over purchasing a pre-made option:
By taking the time to create your sploof, you’re not only saving money but also gaining greater control over your smoking experience. With just a few simple materials and a bit of creativity, you can enjoy discreet smoking wherever you go.
Crafting your sploof is a simple yet effective way to enjoy smoking discreetly while minimizing the impact on those around you. By understanding the importance of a sploof and following our step-by-step guide, you can create a reliable smoke filter that meets your needs and preferences. So why wait? Gather your materials and get started today to experience the freedom of smoke-free living.
Flowering typically runs 7-12 weeks depending on strain, and it

Neither method is objectively “better” — they trade off cost,

Left alone, a cannabis plant grows one dominant main cola

Overfeeding is the single most common mistake new growers make