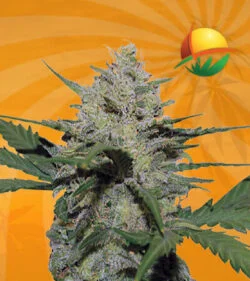
Outdoor cultivation is the lowest-cost way to grow cannabis — the sun handles your lighting, rain and soil handle a lot of your nutrition, and you’re not paying for a tent, fans, or a light setup. Feminized seeds make outdoor grows specifically easier, since you’re not spending weeks identifying and pulling male plants from a garden you can’t watch as closely as an indoor tent. Here’s what actually matters if you’re planning an outdoor grow this season — real timing, real setup steps, and the strains best suited for it.
If your goal is harvest, not breeding, feminized seeds are the more efficient outdoor choice for exactly the reasons in that table — you’re not gambling half your garden space on plants you’ll have to pull.
Step 1: Choose the Right Location
Outdoor cannabis needs as much direct sun as you can give it — a minimum of 6 hours, ideally 8 or more, during both the vegetative and flowering stages. Before planting, track the sun’s path across your intended spot for a few days; a location that looks sunny at noon can be shaded by a fence line or tree canopy by mid-afternoon.
Good outdoor locations include:
- Open garden beds with full southern exposure (northern hemisphere) or northern exposure (southern hemisphere)
- Raised beds or large containers on a sunny patio or rooftop
- A fenced backyard, both for privacy and to keep wildlife out
- Balconies, if your climate and local regulations allow it — screened with privacy fabric if discretion matters
Step 2: Time Your Planting
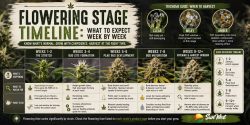
This is the step most guides skip, and it’s the one that actually determines your harvest. Cannabis is photoperiod-sensitive outdoors — it vegetates through long summer days and begins flowering as days shorten in late summer/early fall (northern hemisphere) or late winter/early spring (southern hemisphere). As a general rule:
- Northern hemisphere: plant after your last frost date (typically April–May), harvest around late September–October
- Southern hemisphere: plant after your last frost date (typically October–November), harvest around March–April
Starting seeds indoors 3–4 weeks before your outdoor transplant date gives your plants a head start without exposing young seedlings to unpredictable spring weather.
Step 3: Prepare Your Soil
Cannabis is a heavy feeder. If you’re planting directly in the ground, amend your soil with compost and aged manure at least a few weeks before planting to let nutrients start breaking down. If you’re using containers, a living soil mix formulated for cannabis (or a quality potting mix amended with compost and perlite for drainage) will outperform generic garden soil. Container size matters more outdoors than most new growers expect — a 15–25 gallon container gives roots enough room to support a full-sized outdoor plant through to harvest; anything smaller will restrict yield.
Step 4: Water and Feed Consistently
Outdoor plants rely more on rain than indoor plants rely on a scheduled watering routine, but don’t assume rainfall alone is enough — check soil moisture a few inches down and water when it’s dry, rather than on a fixed schedule. As plants move into flowering, they’ll want increased phosphorus and potassium and less nitrogen; a bloom-specific nutrient line or compost tea works well for organic outdoor setups.
Step 5: Manage Pests and Mold Proactively
Outdoor plants face threats indoor grows don’t — aphids, spider mites, caterpillars, and powdery mildew are the most common. A few concrete steps that actually help:
- Inspect leaves (top and underside) weekly for early signs of pests or mildew, since catching an infestation early is far easier to manage than a mature one
- Improve airflow by spacing plants adequately and pruning lower fan leaves that don’t get much light — tight, humid canopies are where mold starts
- Use organic pest deterrents (neem oil, insecticidal soap) preventatively rather than waiting for visible damage
- Choose mold-resistant genetics if you’re in a humid climate — some strains are simply more resistant to bud rot than others, which matters more than technique alone in consistently damp regions
Which Strains Grow Best Outdoors?
Not every strain is equally suited to an outdoor environment — some handle humidity, wind, and temperature swings better than others. A few worth considering for an outdoor grow:
- Durban Poison — a landrace sativa bred for outdoor African conditions, generally hardy and forgiving
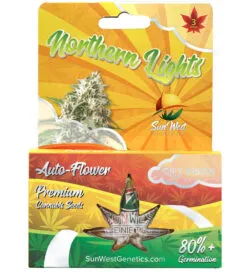
- Northern Lights — compact structure and a shorter flowering window, well suited to shorter growing seasons
- Browse the full Best Outdoor Marijuana Seeds collection for strains specifically selected to handle outdoor conditions
If you’re planning an outdoor grow this season, the earlier your seeds go in after your last frost date, the more established your plants will be heading into flowering. Shop feminized seeds now →
FAQs
1. Do feminized seeds really eliminate the risk of male plants outdoors? Feminized seeds are bred to produce almost exclusively female plants, which removes the need to monitor for and remove males — though no method is 100% guaranteed, feminized genetics dramatically reduce the risk compared to regular seeds.
2. When is the best time to plant outdoors? Plant after your last frost date — typically April–May in the northern hemisphere and October–November in the southern hemisphere — so seedlings aren’t exposed to unpredictable cold snaps.
3. How much sunlight do outdoor cannabis plants need? A minimum of 6 hours of direct sun daily, with 8+ hours ideal, during both the vegetative and flowering stages.
4. What’s the biggest risk to an outdoor grow that indoor growers don’t face? Weather and pest exposure — humidity-driven mold and outdoor pests like aphids and spider mites are far more common outdoors, which is why airflow, plant spacing, and proactive pest management matter more than they do indoors.
5. Can I grow feminized seeds in containers instead of directly in the ground? Yes — containers in the 15–25 gallon range work well outdoors and give you more control over soil quality than planting directly in native ground soil.
 ,
Canadian orders ship from Canada
,
Canadian orders ship from Canada
 .
.