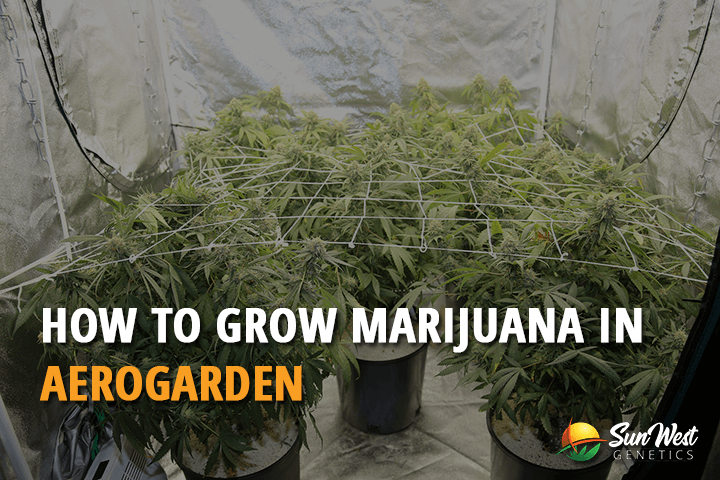
With the fast-paced technology and smaller area obtainability on our terraces, growing weed in aerogarden has developing to attract the trend. For some, they practice Aerogarden to flower when they buy cannabis seeds. It is one of the laid-back methods to yield your personal hydroponic weed.
Based on Mindless Gardening, using a system called aeroponics, developing plants in the air without the usage of soil, you simply add water when it signals you and adds mineral every two weeks. The exact amount of new harvest right at your fingertips without the stress of surplus bulk bundles from the stock that goes bad.
In a nutshell, you basically toss the seed hulls into the cover inserts, fixed the plant lightly to your preferred times and add liquid and minerals. With the exemption of routine maintenance and gathering your personal newly full-grown yields, the propel does most of the labor from then on. Thus, AeroGardens are suitable for growers who merely desire a little, stress-free planting structure in their households. They are also an ideal structure for beginner hydroponic planters.
How To Grow Cannabis in Aerogarden
AeroGarden Model
Every AeroGarden model is suitable for germinating seeds. Though, when you arrived in the seedling phase, you really require sufficient lighting from there on out. It is recommended to select an Aerogarden model with an LED light that spreads 24” in altitude.
Here are your best options:
AeroGarden Farm
It’s more expensive than the other AeroGardens, but the Farm models have the most functionality and accessories which will give you over 2.5x the growing. The system is fully automated to adjust to your specific requirements, features dual, energy-efficient LED grow light which extends to 24” and can be independently adjusted to accommodate your growing. The unit measures 36” wide and 12” deep.
AeroGarden Bounty
Among the minor choices, the AeroGarden Bounty is one of the most powerful models accessible. They are fully computerized with energy proficient LED grow lights spreading to 24”. While these prototypes will permit you to remain through the vegetative phase of development and into flowering, additional lighting is recommended.
The Bounty model also contains a touch screen regulator section that keeps things very simple and amusing to manage!
Weed Strain
Since the concentrated grow stature is merely 24 inches it’s vital to select a strain that will remain short and dense.
Recommended Strains
- Amnesia Haze
- Blueberry
- Blackberry Kush
- Lowryder
- Northern Lights
- White Widow Auto
- Water pH Level
If possible, use distilled water to fill the basin. On condition that your growth room temperatures remain in the 60’s and 76’s degree scope, you shouldn’t be exaggeratedly worried about regulating the water heat. Apply a pH meter to constantly regulate the pH balance. The pH of the AeroGarden solution must be within 5.0 and 6.0.
Make sure that there is sufficient liquid inside the Aerogarden so as not to jeopardize the development and vigor of your plants. If the pH alters a lot or is out of control for a long time, your plant leaves will become slanted specifically in the fresh develop areas, so it’s secure to be extra vigilant about it. For best results, change your water and sanitize root remains every 1-3 weeks.
Grow Lights
Program your AeroGarden so that the LED lights follow this schedule:
- Seedlings: 20 hrs lights on / 4 hrs lights off
- Flowering Period: 12 lights on / 12 lights off
Once your seedlings have germinated, we suggest that you add supplemental grow lights. Since total darkness is required for off hours, also consider using a grow tent as well.
Distribution of light is important to all the plants in the Aerogarden, so any plant that grows way ahead than the others had to be trimmed once in a while.
Nutrients
Before adding the mixture into the AeroGarden’s container, you need to confirm, with the TDS digital meter, the concentration of minerals in the solution. Do not add more than the suggested concentration, as this may cause a nutrient burn.
The external air pump can be added as this helps to prevent roots rot, and bring more oxygen to the roots.
Aerogarden Setup
- First, fixed the time, and select the ‘grow anything’ route if you’re in the quick plant tab.
- Click the ‘sun’ image, and follow the stages to arrange the grow light. If you have autoflowering seeds, 20/4 light set. For feminized seeds 18/6 for the vegetative period, then trigger flowering period, shift to 12/12.
- Click the water image, and then modify settings. Follow the stages until you arrive at the ‘pump on/off’ display. It’s healthier to supply an oxygen enhancement in the liquid for the expanding root masse of your plants in the flowering stage. So, if you don’t have an exterior pump, fix the pump to 60 minutes on, and 30 minutes off.
- You can organize the AeroGarden made-in pump 10 minutes: 60 minutes on/off when you work with the exterior pump.
- Lastly, click the nutrients image, and then settings. Fix your nutrients phase to 7 days. AeroGarden will provide you a notice every week to add minerals and change the water.
The fact is many growers have verified that AeroGarden is adept of conveying a cannabis plant from seed to yield. Since leak systems are extensively used in the cannabis gardening, it will come as no astonishment that this kind of hydroponic structure should work just adequate for cannabis plants.
Some detractors argument to the structure’s plan boundaries. Even with such defies, you can still have fruitful cannabis breeds using a regular AeroGarden system. So buy cannabis seeds and have your own aerogarden!