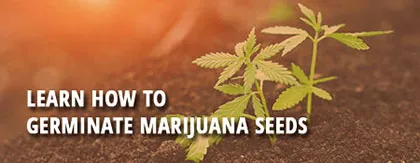
If you know anything about growing and cultivating cannabis, you know that having the best seeds matters. However, even if you have the highest-quality seeds in the world, they won’t mean much if you can’t germinate them correctly.
Fortunately, it’s pretty easy to germinate cannabis seeds, and several methods are available. This article will break down each technique and discuss which type of cultivation it’s best for (i.e., hydroponic, soil, or outdoors). Whether you’re new to cannabis cultivation or just want to make sure you can maximize your yield, here’s what you need to know.
Why Your Seed Germination Method Matters
The primary reason to pay attention to your seed germination methods is to ensure that you can grow the most seeds. While some seeds may not germinate properly, you need to maximize your yield as much as possible. Feel free to experiment with different germination options until you find one that’s reliable and syncs well with your cultivation and harvesting methods. For example, if you’re planning to grow cannabis with hydroponics, it doesn’t make sense to germinate your seeds in the soil.
Paper Towel Method
If you have a lot of paper towels on hand and you’re looking for something easy to do, this method is one of the simplest. However, if you’re growing cannabis on a large scale, you’ll need to focus on something that allows you to germinate many seeds without needing too much infrastructure. Overall, the paper towel method works best for soil or hydroponics and only for medium to small operations.
What You’ll Need
- High-Quality Paper Towels – You need something that won’t get too mushy or break apart when wet. So, don’t cheap out and buy flimsy towels that can’t hold up.
- Resealable Plastic Bags – You can take your pick of different brands, but we recommend using gallon-sized bags so you can germinate lots of seeds without needing so many bags.
- Water Sprayer – While you can soak your paper towels, spraying them with water is often better. This way, you can get them moist enough without having to wring them out too much afterward.
Step by Step Instruction
- Step One: Arrange Your Seeds – You’ll need to place a line of them in a paper towel once they’re wet. So, having them ready to go will save you a lot of time.
- Step Two: Wet Your Paper Towels – Use a sprayer or a faucet to get your towels wet. They should be damp but not dripping. If necessary, squeeze the towel to remove excess water.
- Step Three: Put Your Seeds in the Towel – Put the seeds in a line on the bottom half of the towel. We recommend doing this lengthwise so you can germinate as many seeds as possible. However, don’t put them too close together – leave about a half-inch between them. Then, fold the towel over and press it gently against the seeds.
- Step Four: Seal Your Seeds – Place a towel in a plastic resealable bag. If you have the space, you can place two or more towels in the same bag. As long as each towel has sufficient water, you shouldn’t encounter any problems.
- Step Five: Place in Sunlight (or LED Lights) – Germination can take between three and five days. You’ll start to notice sprouts coming out of each seed. Be sure to remove the seeds as soon as possible, so they don’t get stuck to the paper towel.
- Step Six: Transfer Your Seeds – Once germination starts, you can transfer your seeds to your hydroponic or soil environment.
Rock Wool Method
If you’re using hydroponics, we recommend buying squares of rock wool because you can use them throughout the growing process. Otherwise, this method is a bit too expensive and complicated if you’re just going to transfer your seeds to the ground once they’ve germinated.
What You’ll Need
- Rock Wool Squares – You can find these at local nurseries and hydroponics stores. You can either buy solid squares or ones with holes pre-made for the seeds. You can only germinate one seed per square, so plan accordingly. This setup means that rock wool isn’t necessarily ideal for large-scale cultivation.
- Buckets or Trays – You’ll need to soak the wool for several hours, so it helps to have buckets or trays of water. Be sure to have enough to hold as many wool squares as you’re planning to buy.
Step by Step Instruction
- Step One: Soak Your Rock Wool – Soaking is essential because the wool won’t have enough water to germinate the seed otherwise. Make sure that each wool square is completely submerged the entire time. Once they’re soaked, you shouldn’t squeeze them to remove excess water. When handling dry rock wool, we recommend wearing a face mask so you don’t accidentally breathe in tiny wool fibers.
- Step Two: Place Your Seeds – If your squares don’t have seed holes already, you can use a toothpick or knife to make each hole. This step should actually precede the first since it’s easier to make holes in dry wool than wet. Either way, put one seed in each hole.
- Step Three: Place Your Squares in the Sun (or LED Lights) – As with the paper towel method, the seeds can germinate between three and five days. Fortunately, you can grow the plant in your rock wool, so you don’t have to transfer it.
Water Method
This option works well for both soil and hydroponics, but if you’re growing your plants in the water anyway, you won’t need to transfer them once they start germinating. Also, the water method is the fastest because the hard outer shell weakens from the moisture, allowing the sprout to come through more easily.
What You’ll Need
- Water Container – If you’re building a hydroponics setup, you can simply place your seeds in the water tank you’re planning to use for cultivation. Otherwise, you can use trays or buckets (or even water cups).
Step by Step Instruction
- Step One: Fill Your Containers With Water – Another great thing about this method is that you can germinate lots of seeds quickly, making it ideal for high-volume growers.
- Step Two: Keep Your Containers in Sunlight – All cannabis seeds need to germinate are water and sunlight, so just ensure they get plenty of both. In most cases, you’ll see sprouts start to appear within 24 to 48 hours. Discard any seeds that haven’t germinated after a week.
Standard Soil Method
If you’re going to grow cannabis in the ground, there’s no reason to germinate them first. However, some growers prefer germinating the seeds before planting them because the methods above are faster than growing in the soil. This method takes so long because the seed can grow roots deeper into the ground before sprouting upward. So, you may not notice anything until after a week or so, even though the seed has already germinated.
What You’ll Need
- Fertilized Soil – Before growing cannabis in the dirt, read what kind of nutrients it needs. Typically, you’ll have to use regular dirt and fertilizer to get the best results.
- Planting Spike – You can also use your finger to make holes in the soil, but an industrial planting spike speeds up the process.
- Watering System – Some seeds may need lots of water to germinate, while others may only need a little. You can either water your seeds manually (i.e., using a watering can) or automatically with a sprinkler system. Be sure to calibrate your system before planting.
Step by Step Instruction
- Step One: Get Your Soil Ready – Mix your dirt and fertilizer until it’s the proper ratio of nutrients for your cannabis plants.
- Step Two: Plant Your Seeds – Use a spike to make small holes in the dirt and place a seed in each hole. Since you’ll be growing and cultivating the plants in the same spot, we recommend putting holes every foot or so. This kind of spacing gives each plant more room for its roots.
- Step Three: Water Your Seeds – Read the instructions for your seeds, so you know how often to water them. As we mentioned, it helps to have an automatic watering system, so you don’t have to spend so much time on this process.
The Bottom Line
No matter what kind of germination method you use, feel free to experiment with the details so you can maximize your yield and germinate your seeds faster than ever. Also, if you want the best seeds, browse our selection online or call us!