
Top 10 Cannabis-Friendly Honeymoon Destinations
In our exploration of the most captivating weed-friendly honeymoon destinations
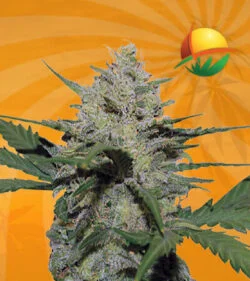

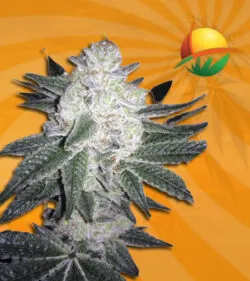


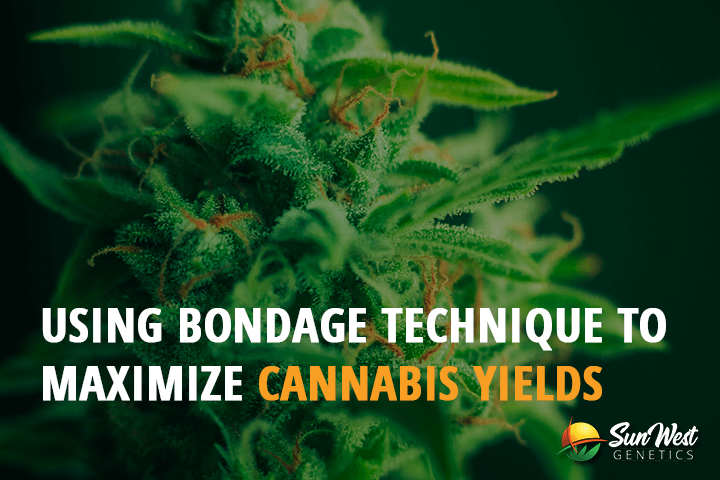
Getting larger, better yields is the dream of every cannabis grower. They look for strains that grow large, dense buds and techniques that can maximize their yields. There are proven ways to increase yields like providing proper plant nutrition, using good soil, and using plant training techniques. One of the most efficient techniques that require only some string is the bondage cannabis technique.
Whether you’ve grown cannabis before or you’re new to it, learning simple bondage techniques is something you must consider. This is a tutorial of the basic techniques for cannabis bondage. It is useful, especially in growing medical marijuana where you are only allowed to grow a limited number of plants. You’ll get a larger yield for every plant than using other techniques like topping and fimming.
Bondage or binding cannabis plants is using string to hold the main plant branches and stems from changing its growth pattern. Normally, a cannabis plant grows like a Christmas tree. There are a single trunk and the main cola on top. There are large fan leaves at the bottom of the tree, which are older leaves and younger leaves become fewer and fewer as you get to the top of the canopy.
Usually, only one main cola or bud survives, especially if nothing is done to change the growth of the plant. There could be smaller buds located at the bottom of the canopy, but these won’t become as large as the main cola and are usually removed to divert nutrients to the main cola.
But when you apply bondage techniques, you’ll be able to control the plant growth and get more yields. Cannabis is a very adaptable plant. These will grow in almost any condition for as long as you provide it the best nutrition and a good growing environment. But you must plan how your bondage technique will work; otherwise, you’ll be wasting your chance to grow healthy, high-yielding plants.
Bondage is also called main-lining, which is described as the act of training a marijuana plant to form what is called a “hub” or a “manifold” from a single node. This way, there is a center for improved, equal distribution from the plant roots to every cola.
A hub is a central area where an activity takes place. In the case of main-lining, the hub is the trunk of the plant and is where roots are connected. The manifold will grow from the hub using topping and bondage techniques.
The term main-lining was developed by an avid cannabis grower. It was described as a form of cannabis plant training to help the plant grow evenly and developing fat colas with no tiny popcorn-like buds that are usually discarded.
The tiny popcorn buds are removed because these just compete for nutrients that should be allotted to the large main bud. But with main-lining, there won’t be any popcorn-like buds, and thus there will be better results with less energy and resources wasted.
With main-lining, you’ll have a plant where every main bud or cola is the same number as the steps from the roots. All colas will grow from the exact numbers of parts of the plant. This arrangement helps each cola get an even amount of energy.
By successfully applying main-lining techniques, plants will have an even and flat canopy that produces good yields for indoor cannabis growers. There are many cannabis growing techniques that you can use to produce an even plant canopy, but main-lining may be the best technique for people growing cannabis on a small scale.
The purpose of main-lining is to create a hub from a single node, constructing a manifold for even energy distribution from the roots to the tops.
Bondage techniques are more preferred than other training techniques. Although this is considered moderate to high stress to plants, the returns are high. You’ll get bigger yields with the setup that you started from the beginning of the bondage training until harvest time.
You can set your bondage setup and just forget it. After the initial steps are done, you don’t need to do anything to preserve the plants; you can just look forward to your good yields come harvest time.
You will get colas of the same height with no small or popcorn-like buds. Because the plant’s energy is properly distributed among all the colas, stretching of the plants during the flowering stage is reduced. Stretching is not good because it causes severe problems, especially for indoor plants.
With bondage, you’ll get larger yields without changing your lighting setup. You also have better control over the shape of your plants if you’re growing cannabis stealthily. The end result is more desirable and consistent.
Main-lining is basically a concept of growing a plant from a single node. Don’t worry because you don’t have to get everything done perfectly to get good benefits. Most growers do main=lining according to their style and still get good results as long as their hub and manifold from a single node.
This method is a very useful and powerful way to take control of your crops, especially in small growing spaces. It’s also great for outdoor growers as they can control the size and the shape of their plants and create a more consistent yield all year round.
Most of the work in main-lining is done at the start of a plant’s life in the first few weeks. And after this crucial stage, you can just sit back and watch how it’s done.
Simple bondage cannabis technique tutorial
You will need the following on how to bind your cannabis plants
Canopy rings are simple heavy-duty rings made of aluminum are available in garden stores. These are usually used to grow peonies and tomatoes. You can modify this by bending the wide according to your setup. When you combine the peony cage with string, you can easily modify the growth of your plants by binding the stems along the perimeter of the cage. This ring can also come in handy when placing the plants in defined spaces.

Instructions
Grow the seeding in a wide-mouth pot. Place the seedling in the middle of the pot so you’ll have room on all sides to manipulate your plant.
Wait till you have a total of 5 to 6 nodes. You must wait this long because a plant that has reached this stage without any problems is a sign that it is healthy, strong, and ready. But if your plant is not growing quickly or healthily, wait a little longer.
A node is a set of leaf tips that are always found in the elbow of two large leaves. The growth tips are easily seen even by the naked eye. It is found very near the trunk at only a few millimeters from it and is darker colored than the rest of the stems.
You may also use main-lining on older and bigger plants with more nodes, but take note that you will need to cut off the top of the plant to the third node. The bigger your plant is when you begin the process, the more this will set you back, and thus, you’ll only waste time.
But other than the time, money, and resources lost, you can always use main-lining on any cannabis plant. Just make sure that the plant is still in the vegging stage. Don’t main-line a plant if it is already near the flowering stage.
Don’t use this technique on plants that have less than 5 to 6 nodes or on young clones. At this time, your plant may still be weak or unestablished. It may not have time to grow a healthy root mass, and thus, this technique may only slow down their growth. So, no matter what, start main-lining when your plants have 5 to 6 nodes.
Cut the top of the plant. This technique is known as a topping. Top it down to the third node. So from the soil, count three nodes and cut just a few millimeters from the top of the third node. You may throw away the part that you cut, or you can replant this to create a clone of the plant. When you’re done topping, your plants will now have a total of 3 nodes.
Afterward, remove all the plant growth below the third node. Remove fan leaves, cotyledons, and stems. The third node will serve as your main-lining manifold, and removing all the growth; the plant will send all its energy to the third node (now your manifold).
To summarize, the purpose of cutting down the third node and removing all the growth down from it is to just leave the two growth tips on the third node. All the plant roots will bring the energy to this single manifold.
Sometimes it’s better to leave a few fan leaves in case the third node is not yet fully developed. The fan leaves will be able to help grow the third node.
Once the two new mains are stronger, you may now tie these down gently to form a right angle to the ground. But if the two mains are still too small to be tied down, wait for a couple more days to tie these down. And once your mains are stronger, you may now bend these safely.
Keep in mind that different strains have different characteristics; therefore, some may respond well to training while some don’t. In case you break a stem while bending, tape it up with duct tape, and the plant will surely heal on its own.
And after bending, the new mains give your plants time to adjust. Give it two to three days between each step to see the response of your plants. Use slow and gentle movements.
Some main-lining concerns
If your plants are young or if it has any kind of problem or nutrient deficiency, better be cautious and wait longer between two steps.
Also, in securing the two new mains, tie these down but don’t cut through the stems. The material you will use to cut them down must not be sharp to cut through the stem or the surface of the stem. Good materials are soft gardening wires, paper clips, or coat hangers. Strings should be avoided since these can cut the surface of the stem and injure the plants.
Now that your main-lined plants have a signature manifold appearance, it’s time to grow your plants vigorously once more.
The new colas should be carefully monitored. Wait until your plants started growing healthy and fast. It’s time to move to the next step when you see that the colas are now growing upwards. Meanwhile, some growers wait until their plant has grown more nodes while some cut plants after the tips have formed.
After the plant has grown extensively, look along with the mains for new nodes that can be used as new mains. The nodes must be located in the same area as the hub or manifold. From each new main, select a node. The node that you selected will be the basis of new mains after you top your plants.
A very important part of this step is you must be sure to select the nodes found at the same place on either side of the plant. This is very important, so the manifold is efficient in the delivery of nutrients to the different parts of the plant.
Choose nodes with symmetrical growth, but this is not a requirement. Main-lining will still work as you pick the nodes in the same place on either side of the manifold. And once you picked the node, top that node or cut the stem directly right above the node. Cut on the same place on every main that you selected. The cut that you make should match the cutting on each side of the manifold.
Be careful not to damage the growth tips from the node because each one will become a new main. Leave the large fan leaves that are directly attached to your new mains because these will power the plant’s growth. Remember that every time you top the mains, you will double the number of main colas so after this step, you’ll have twice the number of mains as you have had before.
Just like what you have done earlier in the third main, remove all the growth tips below your new mains. You can start removing the new mains right after topping, but you can also wait for two or three days before you do so. You may wait till the plant has completely rested before removing growths under the new main.
You may also choose to leave the fan leaves or remove them. Some recommend removing all the fan leaves except for the ones attached to the new mains. It’s also important that you remove all the growth tips besides the new mains. This is so your plant will put all the energy into growing the new mains. Every single tip only steals the energy from the manifold, so these should be removed after just a few days.
Each time you top a plant, you are doubling the number of colas; this is because you’re splitting the main cola to two. Therefore, you top a plant to get two colas, top it the second time to get four and top it the third time to get eight, and so on.
When growing indoors, grow your plants with eight total nodes. So you need to top three times, including the first time. When growing outdoors, top three to four times to get 8 to 16 colas. And if you want to grow your plants using SCROG or the screen of green method, top it 5 times to get 32 colas. This will give you the most out of each plant under the screen. The SCROG technique is best for growing sativa strains or sativa-dominant strains. Also, allow the plant to stretch and to fill out the net before flowering is initiated.
Do you need more colas? More colas do not mean that its best for your plants. Usually, more mains don’t result in larger yields, and your plant could stay longer in the vegetative stage.
Now that your plant’s manifold and mains are all set, you may now guide the growth of your plants to the desired size and shape. Some growers secure their mains using gardening wire to attach the colas to the pot or the reservoir in case of hydroponics growing.
This is the best time to attach the peony ring. Now, these may be too tall for your topped plants, but you can always cut the legs to adapt to the size of your setup. The hoop or ring should rest around 12″ from the soil. You can always use a taller peony ring for bigger plants.
Use soft ties to bind your plants to the ring. Arrange the plant around the ring using the soft ties. If growing indoors and the height of the plants are limited, super crop, the plants top keep the canopy short and in an even appearance. You may attach the cola to the edge of the ring, or you can leave a few unattached for the middle part of the structure. Therefore, for 8 colas, 6 should be attached to the ring, arranged equally around the ring and two will be left free to grow in the middle of the ring.
Now that the ring is ready to remove clips and wires that you use to hold the plant down. Once the manifold is formed, you may now remove the bonds because if these are left too long, the wires and ties can eventually damage the plant. Also, leaving the wires and ties too long may stunt the growth of the plant.
Aftercare
Allow the plants to continue vegging until the tops have reached around 6” above the ring. Once this happens, switch to the flowering stage.
If you spot any cola growing taller than others, slide it back gently around the ring until this has an even height. Or if you don’t use a peony ring, just pull the tall cola out and away from the plant center and use a string to secure it. You can use a string and the peony ring to control the growth of the plant according to the space you have at home.
Not all cannabis strains will work well with this technique. It’s best to use resilient, hardy strains. Strains that are easy to grow won’t require special nutrients and soil, and those that are resistant to common cannabis conditions and nutrient problems are good candidates for the bondage technique.
As there are advantages of using the bondage technique, there are also some negatives you must consider. First, it is not for regular, first-time cannabis growers. You need to have experience in topping plants and have a basic knowledge of the anatomy of the cannabis plant as well.
It is only for the patient grower and not those that are too eager for more buds, more yields, and more money from his plants.
Also, it needs time to complete and takes a plant back a few weeks into the vegetative stage. But when you perform every step properly, and you allow your plants to recuperate before each step, you can use this bondage technique for more yields.
In our exploration of the most captivating weed-friendly honeymoon destinations

Bongs play an important role in enhancing the smoking experience.

Marijuana allergies are a topic of growing interest due to

Cannabis-infused lubricants, often called cannabis lube, have become popular recently